
With a budget of $200 we took the sunroom from:
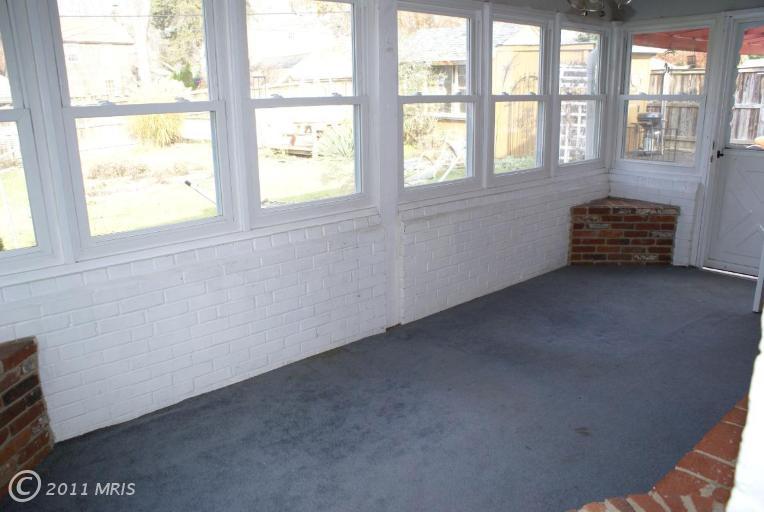 |
| Before: Vintage blue carpet charm |
 |
| After: Warming breakfast nook |
We started with the painting. This is the only room we didn't tape or cover the floors because under the carpet was exposed red concrete which we knew we'd replace. We painted three of the brick walls a custom green color. Why custom? The initial green that I selected was way off mark, and DH called it "neon." The remaining wall was painted with the semi-gloss paint we had left over from painting our trim (I always over estimate paint quantity needed for a project).
We then moved on to the floors and spent three painful days trying to figure out how to make them work. DH and I didn't kill each other, but I'm sure he thought about it. The locking mechanism of the laminate floors were not as easy as on HGTV! They wouldn't lock on the first attempt, so we had to use a lot of force to get them to click (please note-despite the excessive profanity and laminate flooring abuse we had zero floor board waste during this project).
 |
| First row took all of day one |
 |
| Our cat assisting with the angles |
On day two we promised not to get upset, added a kiss for every successfully locked plank, and took a few more breaks--which extended the project to three days.
 |
| Day 2 we got smart and used knee pads |
DH spent most of day three with his new toy making the cuts for the round brick benches.
 |
| DH still has all 10 fingers :) |
What a difference a little bit of paint and updated flooring can make! Our previously unused sunroom is now our informal dining area!
 |
| After: It's done!!! |
Dollars & Cents:
- Laminate flooring: $150
- DIY Installation: 24 hours, Handyman estimate $1.50sqf or $180
- Paint: $33 Behr (I always over estimate with paint! A gallon was way too much for this space.)
Was saving $180 dollars worth the 24 hours DH and I spent bickering and hugging it out once we finally mastered the locking mechanism? I think DH would agree that it was. Heck, the kitchen might be next!
No comments:
Post a Comment