Monday, April 30, 2012

What Are We Up Too? May 2012

April was a busy month in the Dolce Olin household.  We demolished plastered walls, sewed DIY curtain panels, and contracted out a new sprinkler system.

So what's coming up in May?

  • Complete the Dining Room
    • Update Electric— Outsourced so that I don't burn down the house
    • Recessed lighting 
    • New Walls
    • Paint
    • Wainscoting and molding
  • Class on the crown molding instillation
  • Addition adventure
  • Stencil bedroom focal point wall
May is looking like a very busy DIY month!  What's on your list for this month?  What did you get done in April?

Sunday, April 29, 2012

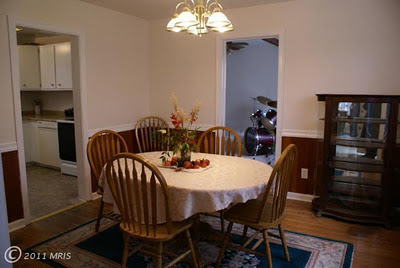
Sneak Peek: Dining Room Rehab

From circa 1970s drab:


To the green that didn't work out:

Saydee Supervising

To the bare bones minus a wall:


We are having so much fun with demo and just completed the load bearing wall with the help of a handyman (HL) who shall now be referred to as HL.   I'm not going to sugar coat the long hours it took to complete the demo, but it's so rewarding to have done it ourselves and save a TON of money.  Demo tends to be my stress release and for DH a pain in the....

We have two weeks and a $3000 budget to rehab the dining room.  Keeping our fingers crossed that we'll get it all done!

Monday, April 23, 2012

DIY Curtains—Panels

We finally finished!  It took us two days and my DIY stationary grommet curtains are done!   These curtains are not for the faint of heart.  There's alot of ironing (I'm more of a steamer kind of girl) and sewing, which I had hoped to avoid.  We tried hem tape, but shortly after ironing it on, the hems came undone resulting in an unplanned trip to Target for my very own sewing machine.

The instructions pick up after measuring the window for length.  I ordered 3 yards for each panel as I wanted to hang the curtains to make the 8ft ceiling height appear taller and have enough fabric remaining for a 4" top hem.


Step 1: Iron your panel and liner.  Don't avoid this step as your fabric will lay flatter during the measuring phase.  Read about my fabric selection here.


Step 2: Lay your panel flat on top of your liner and cut the liner to fit the panel.  Although I absolutely love the panel fabric, I decided to add a liner for additional privacy and thickness.


Step 3: Yep, more ironing!  For the side hems, fold the panel 1/2" and iron.   Fold the panel and liner together another 1/2" and iron.
Step 4: Now it's time for sewing!  Your ironed hems should be enough of a guide for you to sew, but if you need a little help add pins to keep a straight line.  Sew on inner edge of the hem.


Step 5: For grommet curtains fold the top hem at least 4".  Iron and
sew—I told you there was a lot of ironing and sewing!

Step 6: Add grommets— How to here!

Step 7: Hang curtains and pin the bottom hem at the desired length.  Curtain length is like jean length—you can never go too long, but you can definitely go too short (me circa 7th grade).  After pinning for length, you guessed it, iron and sew the bottom hem!


And that's how you get amazing DIY grommet curtains that look like you spent way too much, but didn't.


Dollars and Cents: 
Six panels took 2 days to sew and with hardware the project cost $710.40.  Here's the break down: 

Hardware: 3 at $119
Fabric: Panels- 17 yards at $8.98 and a 20% off promo code ($7.19/yard), Liner- 17 yards at $6.99 and a 40% promo code ($4.20)
Sewing Machine: $120
Misc: Thread, Grommets $40.00 after 50% off coupon

I originally priced this project with traditional box stores and Etsy vendors.  The lowest quote? $399 a window!  It would have cost us $1552 for panels and hardware for three windows.  We saved almost $850 doing it ourselves!

Yeah!!  This was definitely a fun project and my mom was here to help me through my first sewing lesson.  Thanks mom!

Friday, April 20, 2012

Safety First

Can you tell what we're up to this weekend?  I'm like a kid in a candy store and can't wait to demo our dining room! Stats show that DIYers are no strangers to the emergency room so I went out and picked up safety gear to keep us all out of the ER this weekend.


Guard your eyes with impact resistance goggles.  Nothing will send you to the hospital quicker than flying debris from a plaster wall.  Make sure your glasses fit securely on your face.  We picked up these goggles for $8.

Wear a mask!  Our 1940's walls were built with plaster and I'm expecting lots of dust that could cause future respiratory problems.  You never know what you'll expose in old homes as you start to tear them down!  Although a regular paper mask does the job, spend a little extra on a respirator with a valve to avoid fogging up your goggles while working.  We got this mask for $4.

Plug your Ears!  Although we're only using a small sledge hammer it can still get loud as we pound away the plaster.  You can't see my reusable soft foam ear plugs, but they're an inexpensive way to block out noise and protect my hearing!

Protect your hands with reinforced gloves from your local home improvement or hardware store.  We picked these up for $9.  Make sure to get the right size as well!  You'll have a hard time working with the wrong size on.

Sunday, April 15, 2012

Sneak Peak: DIY Grommet Curtains

Martha Stewart would definitely be proud.  After a failed no-sew attempt and having to purchase a sewing machine, I couldn't be happier with how my DIY grommet curtains turned out!

Here's a sneak peak!


Haven't decided on a length

Thanks for all of your input on which fabric to choose.  We went with the Secret Garden and I'm sure it won't disappoint!

Full recap soon!

Friday, April 13, 2012

Window Hardware

Just because I'm out of commission this week doesn't mean that I've stayed away from DIY blogs or projects!  My mom, who is visiting from out-of-town, and I have been working on DIY curtains!

They aren't quite ready yet, but I wanted to share the hardware!

Vintage Oversized Oil Bronze Rod with Glass Finial
I found them during my post Easter shopping trip to Pottery Barn and snagged them with a rewards certificate!

Sunday, April 8, 2012

Happy Easter

From Our Family To Yours, Happy Easter!

via MarthaStewart.com

Saturday, April 7, 2012

The Right Fabric

I've officially gone crazy and it's all because of curtain fabric.  Drapery can do for a room what the perfect bag does for your outfit— pulls it all together!  But what if you can't decide between the Tory Burch or Kate Spade bag?  Shopping for fabric should have been fun, but DH and I can't seem to agree on the fabric.

I'm head over heals over this Michael Miller's pattern I found at Fabric.com:

Secret Garden Grand Tapestry-Khaki

DH loves this pattern from Iman Home Fabrics that we found at Calico:

Sultana Lattice-Luna

Not only are these two patterns polar opposites, but in an ironic twist of fate my pattern cost $7/yard with a promo code while DH's pattern costs $34/yard!  It finally happened!  DH's choice is finally more expensive than mine!

We ordered samples of both, put a poll on our Olin Facebook page, and had a little bit of fun comparing the two on nearly every window in the house, but we still can't decide!


DH being dramatic
We even got a bit creative with adobe photoshop to get a visual! 

Can you picture this in 3D?


What do you think?  Am I over analyzing this?   

Sunday, April 1, 2012

Amateur Architect

I spent all of last week in a class on Critical Thinking—thinking about thinking for better/improved thinking.  How long do you think it took me to stop thinking about better thinking and start daydreaming about our home addition?  If you guessed an hour, you are right!  An hour into class and I was doodling on my complimentary notepad.  

I got home after my first day of thinking class and I could't wait to put my amateur designs into my favorite web based design program!  To help DH “see-it” I used Homestyler by AutoDesk.  Haven't heard of AutoDesk? AutoDesk makes AutoCad, an industry favorite software application for drafting in both 2D and 3D formats.   AutoCad is expensive, but Homestyler is free!  The site is user friendly and it took me about 5 minutes to get the hang of it.  Although there are some items you cannot customize, the program has a TON of options. 

This is our home today.  There's our tiny and poorly designed kitchen with a ton of wasted space.  An empty office space with dented and uneven walls.  

Pre-Addition

And here's our 1st floor post-addition!!  Demolished walls, open kitchen with a HUGE island and marble countertops, and an extra 360 square feet!

Post-Addition 2D

Need more of a visual?


Post-Addition 3D

So what's got me down?  Well, besides my design probably costing an arm and a leg to actually build, there was a post course exam.  Keeping my fingers crossed that I passed.

So what do you think? Any suggestions or constructive criticism?