Showing posts with label diy. Show all posts

Sunday, April 6, 2014

Curtain Call

A great DIY way to change the feel of a room is by changing wall color.  Don't get me wrong, I LOVE to paint, but I'm not ready to part with our Benjamin Moore Santa Monica Blue.  In the spirit of full disclosure, I also have lingering paint-TSD and I don't want to see a paint brush until May!!

So what's another easy way to change a room?  Change the drapes!

My current DIY drapes are perfect for the warmer months so I'm thinking we need the perfect fabric for the winter holiday season.    I've narrowed it down to three of my favorites.


Duralee Danda in Saffron

LIDO A/JRU 02 In 04 Color

Mill Creek Bombolo Rally in Grenadine
Time to dust off the sewing machine!   Which one do you love?

Wednesday, October 17, 2012

Bathroom Update: Part 2

Yep, we are still at it with our bathroom!  I know, I know.  I have been absolutely horrible with providing progress updates!  It's true, you really can't give your best to a 12hr-day job, philanthropy activities, a happy marriage, friends, family, and a blog all at the same time.

But I hope you can forgive me and enjoy the pictures below!!  I am so excited with how all the moving pieces that go into the design and construction of a major bathroom renovation are coming together!!

Let me remind you what the bathroom use to look like


Band-aid Solution

From demo to the finish carpentryless plumbing and electricthis is all because of DH's amazing handywork.

Halfway Through


We splurged a little on our fixtures, but don't you wish this was your shower?


Tuesday, September 18, 2012

Sneak Peak: Upstairs Bathroom

A week into our slower-than-a-hare bathroom remodel and our AMAZING plumber just came over and installed our new right out of the box tub!

Here's a sneak peak!

Long baths ahead

Saturday, September 1, 2012

Sneak Peak: Our Kitchen

Our draft kitchen design is in!!!  It does not look like the drawing I drew in Bermuda, but if you can't add space, you have to work with what you have.

Here is a sneak peak!

The Dream Kitchen?


So what do you think?  Anything you would change?

Saturday, August 4, 2012

A New Front Gate

Demolition is like your favorite donut, you can never just have one.  That's exactly what led our eyesore cinder block to meet its demise.  With a few daylight hours left in our dining room demo day, DH had to tackle another demo project.  

Original Cinder Block Fence

Muscle Building

Inspecting His Handy Work

Remember to ALWAYS wear safety equipment during a project even if your project is a last minute must-do.


I cleaned the area, prepared it for the new fence, and applied the stain.

Cleaning Up The Pieces

Our new fence had to have a few design musts.  It is tall enough that it hides the pool in the back yard from the curious kids in the neighborhood and the opening is wide enough for our cars to make it through. 


After: Our New Gate 
Dollars and Cents: 

Demo: $0  Doing the demo ourselves saved us $300 in labor and clean up costs.  
Fence: $400  We scored a deal on labor and materials by scouring Craigslist for contractors looking for work in the off-seasona tidbit to consider when planning your project's timeline.   

Tuesday, June 5, 2012

Dining Room—Construction Done!

We have a dining room again!  Can you believe we got it all done in just two weeks?!

I'm really happy with how everything turned out despite all of the noise and dust.  Two weeks post-construction and I can vaguely remember how bad the dust really was.  I think about how amazing it is to look at our "before" pictures and see the difference we've made, especially since 80% of this project was DIY!

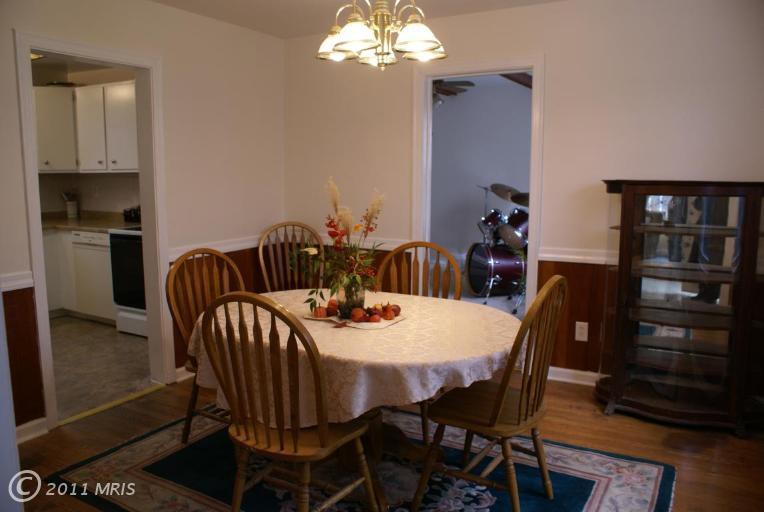
Before: I'm so excited that we took this room from 70s drab

After: To modern classic!  (Don't mind the first apartment furniture!)


Here's the recap:

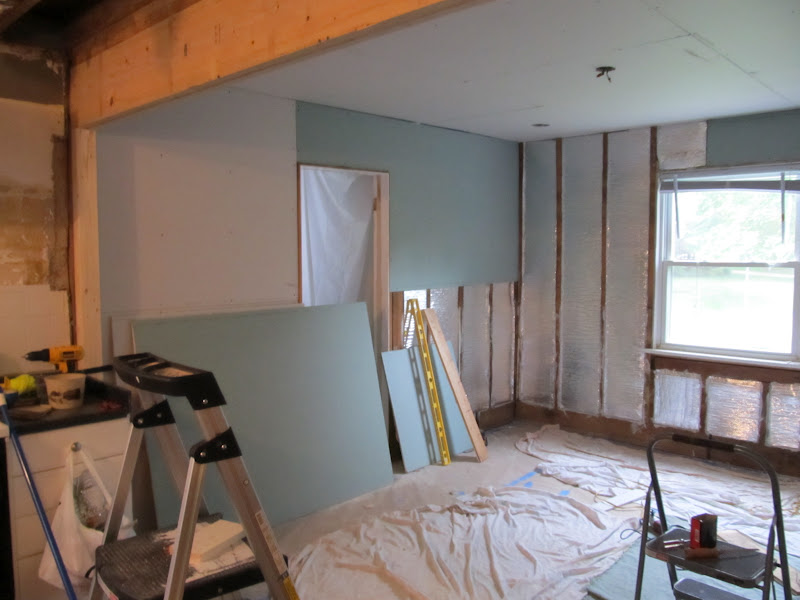
We demo'ed the room to the studs, took down a load bearing wall, and added a beam.  We outsourced the  beam building and our HM also stuck around to teach DH and I how to remove the existing wall and replace it with the beam.


We had an electrician wire the room for recessed lighting—electricity is not something I'm comfortable around yet—added insulation, and drywalled our first room!


We breezed through the remaining items on our to-do list after the drywall mud dried.  Once dry, we sanded, painted, added molding, designed and built the wainscoting.


I can't wait to create a dining room inspiration board and find great furniture!  I really want a round dining room dinner table and funky chairs.  


What do you think?

Dollars and Cents


Yep, I admit it, I blew my budget.   But there is good news; we finished the project on time!  Well almost, we still need to caulk the crown molding seams.  

We blew our budget by $500 not factoring in the estimated $500 we lost in materials in the coffered ceiling debacle.  So $500 isn't really that bad right?

Where did our $3500 go? A large chuck of our budget went to the expected big ticket items including the load bearing wall ($1300), the removal of the construction material ($500), and recessed lighting ($400).  A big chunk also went to the expensive crown molding ($350) DH fell in love with while traveling on our honeymoon.  Insulation, paint, drywall, the remaining molding and wainscoting cost an estimated $950.  

Was it worth it?  Definitely.  The removal of the load bearing wall really opens up the space and flow and it's a great solution to the 600sqf addition that would take forever to save for.

Tuesday, May 29, 2012

California Road Trip

What's the perfect cure to DIY overload?  A road trip!  Just a week after finishing our dining room renovation we're in California enjoying the sun, the beach, and celebrating the beautiful wedding of our friends Katie and Dave.

We're taking the week off from DIY projects and driving from Laguna Beach to Napa.   Of course, it's not a true California vacation until you take the cheesy tourist pic.


Wednesday, May 16, 2012

Almost There— Dining Room

We got a ton done this weekend!  It's actually starting to look like we have a dining room again.  And, to be honest, I'm so ready for this project to be over.   Sixteen days in and I need a break from all of the dust and noise.  I need to eat at a dining room table again and not on my couch.
  
We started the weekend sanding the room and creating a dust storm.  TIP-  OPEN WINDOWS and cover the doorways when you do this.

It took a few hours to sand the drywall mud

DH looks like he's smiling as he applies drywall primer and sealer, but don't be fooled he was as miserable as I was. 

PVA Primer and Sealer preps new drywall for paint

We have wainscoting in the living room and want to continue the pattern through out the house.  measured the wall 36" from the floor and used a laser leveler and blue chalk to mark where we'd paint the blue and white paint.  


Mom and Dad lending a hand

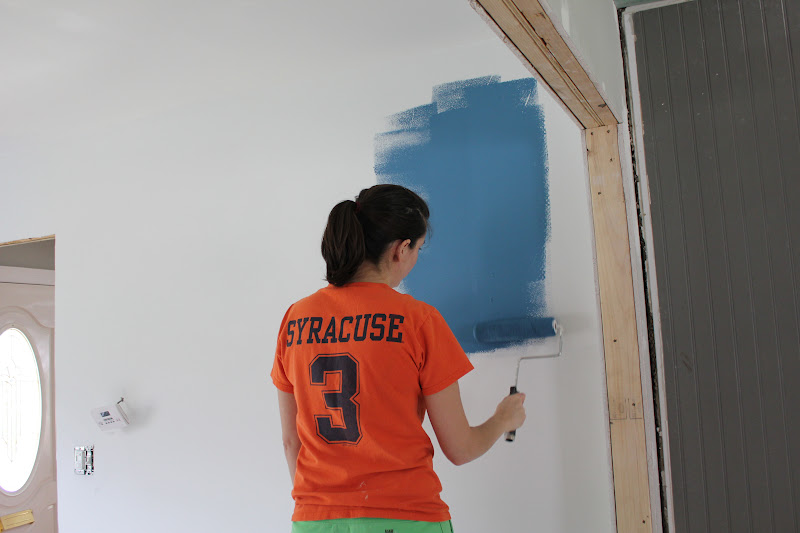
Nine months after moving in DH and I can paint in our sleep!  We used Benjamin Moore's Santa Monica blue in a flat finish for the top of the wall, Behr's Snow Fall in semi-gloss for the wainscoting, and Behr's Swan Wing for the ceiling.  We painted the ceiling and moldings in different shades of white so that they don't blend into each other and you can easily see the crown molding's design when up against the ceiling.


After painting we tackled the coffered ceilings.  Unfortunately, DIY coffered ceilings weren't meant to be and I'm going to need a separate post to walk you through my melt down.

What DIY projects did you tackle this weekend?  How did you handle your first major construction project?


Saturday, May 12, 2012

Everybody's Working For The Weekend

This weekend is going to be legendaryyyyy!  Walls are up, sanding is done and there's a laundry list of must-do's.  We're tackling the painting, the coffered ceilings, door framing, and molding.  We'll probably need a weekend to recover from the weekend.

We have walls again!

Painting Pro

Monday, May 7, 2012

Dining Room—A Slow Day

Today was just one of those days where nothing on our must-do list got crossed off.  We had a late start because of a few hiccups with the electrician who didn't have the right diameter of recessed lighting and drywalling a ceiling really sucks!    

What did we do?

All of my center load bearing boxes for the coffered ceiling are done!  Only 14 T's and corners left! 


My dad and I also tackled some of the drywall for the ceiling.   It took all of three minutes for me to utter my first curse word of the day.  Drywall really sucks!  The darn things are super heavy and its not easy screwing them into unleveled 71year old floor joists! 


While trying to recover from total muscle failure, I tackled the insulation on the exterior walls.  One of our goals for the renovation is to make the house more energy efficient.  Our walls are not framed by 2X4s so I had to find an alternative to the traditional thicker pink stuff while keeping within our budget.  We're using this super thin product called Reflectix that not only acts as insulation— has an R value of 14but as a moisture barrier as well. 


Friday, May 4, 2012

Ceiling Architecture

I have fallen in love with coffered ceilings!  Don't know what they are?  Neither did I until I came across the idea two days ago while Googling  "dining room ideas" for my inspiration board. 

via mainlinekitchendesign.com

Don't you just want these in your kitchen or dining room??  At first, I thought it unlikely to successfully pull this off with 8 ft ceilings.  But after some online research and measuring the beams currently in my not-yet-done office, I decided that it's doable especially when I'm determined to get it done! 

Yep, that's my determined face

Coffered ceilings have become my obsession for the past two days.  First I found amazing DIY instructions written by Gary Katz, which you can find here.  I measured the room, designed a grid, and went shopping!

This is where math class really pays off

It didn't take long to convince DH to let me take a stab at this especially after receiving a $4,800 quote from a very nice carpenter!  Yep, double my total budget for this room!!  

A new nail gun, some finger jointed pine, and an hour later I built a quarter of my first anchor! 

Only 16 more to go!

I'm so excited to take this on!  Do you think I can do it or am I off my rocker?


Tuesday, May 1, 2012

DIY Curtains—Grommets

I was super psyched last week when I actually not only learned how to sew, but I successfully sewed my first pair of curtain panels— you can read about it here.  I really wanted grommet curtains and after some online research I learned that I wouldn't need a grommet tool or a lot of money to achieve the look.

But, in case I failed, I did consider other styles that don't require cutting the panels.

Rod-pocket curtains are made with a casing (a hole in the hem) that you can slip the curtain rod through.  No cutting, no sewing!

via outdoordrapes.com

I was also familiar with the ring-top curtains which are hung on curtains rings that are attached to the panels.   Once again this option is sewing-free!

via houzz.com

Ring-top and rod-pocket are nice, but they're not the look I'm going for in the living room.  Here's how I made grommet curtains.

Note:   Remember, you need at least a 4" wide top hem for grommet curtains.  My curtain panels, once completely sewn, are 42" wide so I used 6 grommets spacing them every 4 3/4".  

Step 1: For the first grommet measure at least 1" from the side hem, and 1 1/2" from the top of the hem.  Use the design tool included in the grommet kit to draw a perfect circle.  TIP: Use a pencil as a pen could bleed to a visible area of the fabric.

Step 2: Cut the circle you just drew with a pair of really good scissors.  


Step 3:  Insert the toothless grommet underneath the panel and work the opening around the grommet rim.


Step 4: Press the grommet together—you should hear a clicking noise.  And that's it!  You just completed your first grommet!


Step 5: Place a grommet over the design tool.  With a measuring tape place the design tool and grommet in your previously calculated distance—  for my panels it was 4 3/7".  Once in the desired location, place the grommet at 1 1/2" from the top of your 4" hem.   Remove the grommet and draw your circle.  Repeat steps 2, 3, and 4.


And that's how you get beautiful grommet curtains!


Dollars and Cents: 
I bought one grommet package every day in order to take advantage of JoAnn's 50% off coupons— it seems like the only way to get a deal in that store!

A package of 8 grommets sells for $12.99, with my 50% off coupon I purchased 5 packages for $35.